Broadcast flipped lessons to get you started

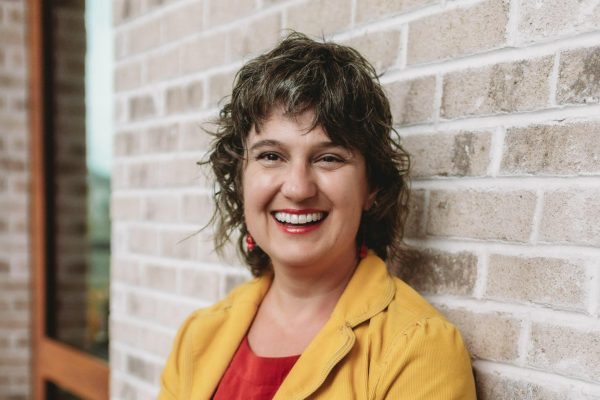
April van Buren teaches at Madison East High School.
by April van Buren
I’ve started a Broadcast program at three schools now. At one point, I was a full-time school librarian without a class of my own, but I had these student aides who were interested in technology and I thought a good, low-stress way to start a broadcast program without a class would be to train my library aides.
I created this list of “flipped lessons” for my student helpers to work through independently and I checked in with them periodically to review their answers/ work.
Since I created this around 2014 or 2015, I have moved back into the classroom full-time and teach both an Intro. Video class and an Advanced Video class that produces a monthly school news and entertainment show.
I find these lessons are still helpful for sub plans, when I have a student that’s missed a lot of class, or when I have talented students that want to skip the Intro. class and go directly into the Advanced class.
They encompass the big concepts that I want all video students to grasp: A-roll vs. B-roll, composition (Rule of Thirds as well as a variety of angles), Sequencing/ Editing to tell a visual story (WALLDO, talking heads), interviewing (more composition/ head room, prepping your interview source), copyright law basics, and some other useful links.
If you’re teaching video for the first time or wondering how you might teach some of these concepts from an online-only classroom, I hope you find these lessons useful.
Flipped Video Lessons
Introductory Video Lessons
1. Composition and Framing
What am I asking you to watch and WHY? When TV shows, news programs and other videos show someone talking – they start with the person’s face talking toward the camera. This is called A-roll, but if it’s too long, people get bored. They don’t want to just see someone’s face the whole time. When someone’s face is on screen too long, that is called Talking Heads and it’s a bad thing.
In order to avoid ‘talking heads,” video producers keep the person’s voice going so we continue to hear what they are saying, but they cut to other images. The images of the “other” stuff we see is called B-roll and, when you are making a video, you need lots and lots and lots and lots of B-roll. In other words, you need to have A LOT of interesting images to show while a person is talking. Sometimes, there is not that much to show, so you have to get creative and take a lot of different shots of similar things from different angles to show more visually interesting things and not just “talking heads.”
Vocabulary: A-roll, B-roll, Talking Heads
Below are links to information about how to creatively look through the camera lens and start thinking about ways to capture good B-roll!
Now, let’s get started. Get a piece of paper, put your name on it and be ready to turn it into Ms. v before the end of the week (date/ deadline here).
2. Rule of Thirds – This is the idea that if you imagine a tic-tac-toe grid over the picture you’re about to take (or the video you’ll record), you want to have the MAIN thing where the lines cross, but NOT right in the exact center of the frame. Stuff that is exactly centered is boring. There are FIVE tips in this video. Watch it and, on your paper, write down the five tips mentioned in the video. http://youtu.be/7XSsV0ZddeU
3. Video Sequencing:
- #1) Ultimate Guide to Camera Shots: Every Shot Size Explained (12:43): https://www.youtube.com/watch?v=AyML8xuKfoc engaging and informative!
- #2) Video Sequencing Made Easy (runtime 4:04): https://www.youtube.com/watch?v=yaiJIaQAvUI – a little CBS 60 min./ slow but good! But shorter and more simple/ straightforward
- The 5-Shot sequence (1:31): https://www.youtube.com/watch?v=h1QeTIWqQwA
- Filmmaking: Composition and Framing Tutorial (7:25): a bit dry, but good detail/ explanations https://www.youtube.com/watch?v=K6N2SpA2XPI (includes lead room and head room as well as framing and a variety of basic shots from wide to extreme close-up)
4. Other angles:
Watch this video that a student from another school made: http://youtu.be/MckWccqwyDI?list=UU-s1yjEkMCsw12Axwtx5uRw
- List all of the types of shots that he names and shows in this video
- Name two video angles/ types from this video that you personally would like to try and film at school on (days you want them to do this)..
6. WALLDO – WALLDO is one way to sequence your shots for anything from a more journalistic piece to a music video or short film. Learn WALLDO and you’ll have no trouble planning, filming and sequencing/ editing a good variety of shots for your videos:
- Virtual Peiser Episode #10 WALLDO-Wide, Angled, Low, Linking, Depth, Opposite (4:50) – good explanations! A little nerdy, but no worse than dad jokes or already being the lame teacher… https://www.youtube.com/watch?v=5DSsupKz-DU
- WALLDO Video Techniques (3:29) https://www.youtube.com/watch?v=Em8rIlk1L6o – explains why WALLDO is useful and presents examples of the sequence/ shots from Myanmar
Wide: https://www.youtube.com/watch?v=qTN6Iv0lNAM
Angle
Low or leading lines
Linking
Depth
Over-the-Shoulder
https://sites.google.com/site/redknightvideoproductiontips/shot-types
Other angles:
Wide & Close up examples/ explanations: https://www.youtube.com/watch?v=qTN6Iv0lNAM
Assignment: Use your cell phone camera to film around your house on one topic (getting the mail, cleaning your room, taking out the trash, fixing breakfast…). Shoot your topic in the WALLDO sequence. You can edit with a phone app like iMovie or Spark video, or upload to the Internet and edit with Adobe Spark Video online. The main goal is that you have at least six shots in the WALLDO order that, put together, develop a story or topic.
7. B-roll/ cuts
Part 1: Learn more about B-roll and talking heads:
How I film an interview and B-roll (skip to 1:10 sec.): https://www.youtube.com/watch?v=g1LCkjv5B48
- Define B-roll:
- Define “talking heads”:
- Watch this video – how many CUTS/separate images/shots did they show?
- Watch this video – how many CUTS/separate images/shots did they show?
Sample videos: Cooper City High School (in Florida) – CTV: http://www.cchsctv.com/video.html
8. Lesson on Copyright Law
http://madison.campusguides.com/VideoCopyright
Watch this video: http://youtu.be/V2MZi0tmzo0
What is Fair Use?
That means that you CAN use what kinds of things?
What is copyrighted?
What else…
9. Lesson on Interviewing
15 Interviewing tips from Camp STN: http://www.studenttelevision.com/data/images/pdf/Lesson_Plans/15_INTERVIEW_TIPS.pdf
Part 1: Writing Good Questions
How to Interview Someone on Camera (3:32): Open v. closed questions, having the source repeat the question in their answer, don’t give them the questions ahead of time, don’t talk too much as the interviewer, don’t talk while they’re talking (no “hmm,” or “yeah”)
Part 2: Before you hit “record”
Read this: http://www.sparkminute.com/2011/11/07/30-tips-on-how-to-interview-like-a-journalist/
How to make someone more comfortable?
Ask them to speak in complete sentences.
Give them a chance to practice talking before you start filming
Tips on shooting an interview with one camera (4:35)
Framing for an interview – good stuff, but may be too in-depth and too long for beginners (22:36)
10. Editing
How-to on the software (Premiere basics: Learn Premiere Pro in 15 min.!, or Basic Editing for Beginners)
How-to: Ordering your clips/ telling a story! See #6 above
11. Brainstorming/ Ideas for videos!!
List of student generated videos & video suggestions/ requests from staff
What ideas do YOU have for videos YOU could make in here?
12. Making a NEWS CAST!
How-to from me! — Chroma Key, etc. https://docs.google.com/document/d/1ikw2QpSs-6IDOpgox0SY_rCWOjZ_d-YFMgtYKDsUbfY/pub
Assignment & simple rubric from Camp STN: http://www.studenttelevision.com/data/images/pdf/Lesson_Plans/HEADLINE_NEWSCAST.pdf
13. to YouTube
- Public: Anyone can see the video and can search for the video
- Unlisted: Making a video unlisted means that only people who have the link to the video can view it. To share an unlisted video, just share the link with the people who you’d like to have access to it, and they’ll be able to see it. Unlike private videos, the people you share the video with do not need to have a Google account to see the video, and they can share with more people simply by forwarding the link to them. Unlisted videos won’t appear in any of YouTube’s public spaces, like your channel page or search results, but it could appear elsewhere on the web if you or anyone who you shared the video with shares it more broadly. Your YouTube account needs to be in good standing to be able to create unlisted videos.
- Private: A private video can only be seen by you and the users you select. The video won’t appear on your channel or search results and will be invisible to other users. BUT: You need to link your channel with Google+ in order to share a private video with other users. If your channel is connected to Google+, you’ll see a field under the “Privacy Settings” drop-down menu where you can add the profiles or email addresses of the people with whom you’d like to share your video. They’ll need a Google account to view your video. You can also share your videos with Google+ circles.
source: https://support.google.com/youtube/answer/157177?hl=en
OTHER Lesson plans/ handouts:
- Also, check out this OTHER self-guided assignment/worksheet I put together on B-roll, WALDO and more! https://docs.google.com/document/d/1G6fZ7tWwGHvIxPX4SVFuWq7Q5VkwnE4YUxI5Garo7ME/copy?usp=sharing
- Assignment: Practice Shooting in Sequence: https://docs.google.com/document/d/16v9e8VgtggDOCIg_xjSY8RXOrJ8ljw_O3nXeVlOewxo/copy
- Prepping to make a Public Service Announcement video: https://docs.google.com/document/d/1ocK3h2NCZQFAAmg9hPRytfy6yqF9b3scS4aZF_9nBKw/copy
Closed Captioning
Once you’ve uploaded the video to YouTube!!!
Self-Reflection – complete a self-reflection form
Other important terms:
NAT Sound
“talking heads”
rendering
lower thirds
Camp STN links: http://www.studenttelevision.com/resources/lessonplan.htm
Vintage Radio Scripts: http://www.genericradio.com/
Writing for Broadcast, how to sound like a real person: http://www.jeadigitalmedia.org/2012/02/28/writing-for-broadcast-how-to-sound-like-a-real-person/
tons of other stuff to check out later: http://www.frankwbaker.com/tvp.htm
Using Viddy? http://www.jeadigitalmedia.org/2013/05/14/using-viddy-for-video-journalism/
iPhoneography: http://www.jeadigitalmedia.org/2012/06/21/iphoneography-how-and-why-to-use-iphones-for-broadcast-journalism/
Some old Tower TV for inspiration:
2016-2017 (only 2 avail.)

